Transfer Photos from an iPhone to a Mac – A Complete Guide
Contents
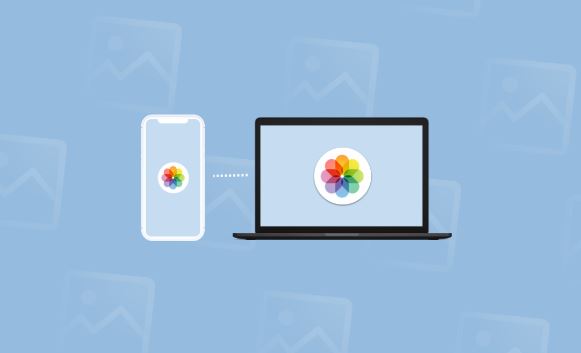
Building your photo library with your owned iPhone is pretty much a thing of pleasure. In this particular guide, you will be aimed at getting familiar about the steps to download iPhone photos to Mac. To know more, keep reading on.
Method 1: Transfer iPhone Photos to Mac at One Tap
STEP 1: The first thing that you require doing is to download AnyTrans for iPhone. You have to install it on your iPhone and then launch it accordingly.
STEP 2: After which, you are required to connect the phone to your Mac computer with the USB cable. Follow the below-offered steps.
USB cable >> Tap on the Device Tab on The Homepage of the AnyTrans >>Tap the Content to Mac option
STEP 3: Now that you are done with the second step, you are required to choose the categories of the photo that you would like to transfer, such as Photo Library, Photo Video Camera Roll, or others. After that, you are required to tap on the ‘Select’option in order to pick up the output folder from where you are required to tap on the right arrow button in order to start off the transferring of all iPhone photos to Mac.
STEP 4:After this, you are required to view the photos exported on the Mac device. You will be able to check the kinds of photos to keep in an organized manner. This concludes everything to know about how to transfer iPhone photos to your Mac device at one single click.
Method 2: Transfer Selected or Multiple Photos from iPhone to Mac
You might not want to transfer all the photos from your iPhone to Mac. Hence, for the ones who wish to transfer selected or multiple photos to their Mac device, here’s presenting the best step-by-step guide! To know more, keep reading on.
STEP 1:The first thing that you are required to do is to download and install AnyTrans for the iOS device on your computer.
STEP 2: Then, you are required to connect the iPhone to your computer with the USB cable.
STEP 3:Then, you are required to tap on the Device tab which is present right on the home of AnyTrans for iOS.
STEP 4:Click the button which is right at the corner in order to visit the content management page of iOS.
STEP 5: After that, you are required to choose the category of Photos and then choose the particular album with photos that you wish to transfer, such as Photo Stream, Camera Roll, Photo Library, or more.
STEP 6: Upon doing so, you are required to preview photos in this particular album and then choose them accordingly in order to transfer to your Mac computer.
STEP 7: After which, you are required to tap on the Mac button in order to get the photos to your Mac device.
Method 3: Import iPhone Photos to Mac via Photos App
In case you have been working with the El Capitan or Mac OS X Yosemite, then you can find Launchpad with a new App which is named as Photos. This is replaced by old iPhone &Aperture with an easier photo editor as well as a library manager. As a matter of fact, it can also be used for exporting images from iPhone to your Mac device.
STEP 1: First off, you are required to run the ‘Photos’ app on your Mac device.
STEP 2: The next thing that you need to do is to connect the iPhone to your Mac device with the help of USB cable.
STEP 3: After that, you have to tap on the ‘click’ tab.
STEP 4: Right after the completion of the aforementioned step, you have to choose the photos that you wish to export to your Mac device.
STEP 5:Click Import XX Selected or Import All Items to transfer photos to Mac.
Method 4: Transfer the Photos from iPhone to Mac via AirDrop:
AirDrop helps in enabling you in transferring the photos from the iPhone to Mac device. For this, you are required to follow some steps.
STEP 1: You have to first swipe up from the screen’s button for bringing up Control Center
STEP 2: After that, you are required to tap the button mentioning ‘AirDrop’. And follow the following steps.
Turn the AirDrop on right from the Settings app >>Visit ‘General’>Tap on the ‘AirDrop’ option.From there, you are required to choose ‘Contacts only’ or ‘Everyone’.
STEP 3: Choose the photos that you require sending to your Mac device.
STEP 4: Visit the ‘AirDrop’ section and type your Mac’s name there.
STEP 5: Now the last thing that you require is accepting the photos on your Mac device. The photos will be saved to the ‘Downloads’ folder on the device.
Also, Check – ES File Explorer Apk Download Steps.
Method 5: Transfer iPhone Photos to Mac via iCloud
The online photo storage service of Apple is known as iCloud Photos. While activating the services, you will have to store iPhone photos here. This will make sure to view the photos later on. You can even download these photos on your Mac device. All you have to do is to sign in with your Apple ID on both the devices. Upon then, follow the below-offered steps.
STEP 1: Visit the Settings option on your iPhone >> then tap on the Photos option. You have to ensure iCloud photos to be kept on.
STEP 2: Now you have to visit the Apple icon on your MAC. You can click on the Apple icon right at the top-left corner of the screen. Now, you have to visit the System Preferences option. From there, you have to choose the iCloud option. Now, you have to check the box which is present right next to the iCloud Photo Library.
Thus, this compiles everything to know about the steps to transfer photos from iPhone to PC. Now that you have been familiar with the easy steps to download iPhone photos to your Mac device, you can proceed effortlessly.


